If you’re looking to improve the performance of your ROG Ally gaming rig, upgrading your SSD is a simple and effective solution. With many modern games taking up significant storage space, a larger SSD will give you ample room for your favorite titles. In this guide, we’ll walk you through the step-by-step process of upgrading your ROG Ally SSD, ensuring a smooth and hassle-free enhancement.
Key Takeaways:
- Upgrading the SSD on your ROG Ally can greatly enhance your gaming experience.
- A larger SSD provides increased storage space for more games and applications.
- Follow the step-by-step guide for a smooth and hassle-free upgrade.
- Choosing the right SSD is crucial for compatibility and performance.
- Optimize your new SSD for faster load times and improved gameplay.
What You Need to Replace the SSD on the Asus ROG Ally
Before you begin the upgrade process, it’s important to gather all the necessary tools and components. To replace the SSD on the Asus ROG Ally, you’ll need:
- An M2 2230 SSD
- A screwdriver
- A plastic separating tool
It’s also recommended to have an internet connection for the installation process. Ensuring you have all the required equipment will help streamline the upgrade and prevent any delays.
Best Practices for Upgrading ROG Ally SSD
Having the right tools and components is crucial when replacing the SSD on your Asus ROG Ally. This ensures a smooth and efficient upgrade process, allowing you to optimize the performance of your gaming rig.
Here are some best practices to keep in mind:
- Choose a compatible M2 2230 SSD that fits the Asus ROG Ally.
- Use a screwdriver and plastic separating tool to safely remove the old SSD.
- Handle the SSD and tools with care to avoid any damage during the replacement.
- Ensure your device is powered off and disconnected from any power sources before starting the upgrade.
- Follow the manufacturer’s instructions and guidelines for proper installation.
- Check for any firmware updates for the new SSD to improve compatibility and performance.
- After replacing the SSD, test the system to ensure it recognizes the new storage device.
By following these best practices, you can upgrade your ROG Ally SSD effectively, optimizing the performance of your gaming rig and staying up to date with the latest methods in SSD upgrades.
Step-by-Step Guide to Upgrading the ROG Ally SSD
Upgrading the SSD on your ROG Ally gaming rig can greatly improve its performance and provide you with ample storage space for your favorite games. Follow these essential tips to ensure a successful SSD upgrade:
-
Gather the Necessary Tools:
Before you begin the upgrade process, make sure you have the following tools on hand:
- screwdriver
- plastic separating tool
- internet connection (for installation process)
Gathering these tools in advance will help streamline the upgrade and prevent any delays.
-
Back Up Your Data:
Prior to upgrading the SSD, it’s essential to back up all your important data. This ensures that you won’t lose any files or settings during the upgrade process. You can either create a backup on an external storage device or use a cloud-based backup service.
-
Power Off and Disconnect Your ROG Ally:
Before removing the old SSD and installing the new one, ensure that your ROG Ally is powered off and disconnected from any power sources or peripherals. This safety precaution will protect your device and prevent any accidental damage during the upgrade.
-
Open the ROG Ally Case:
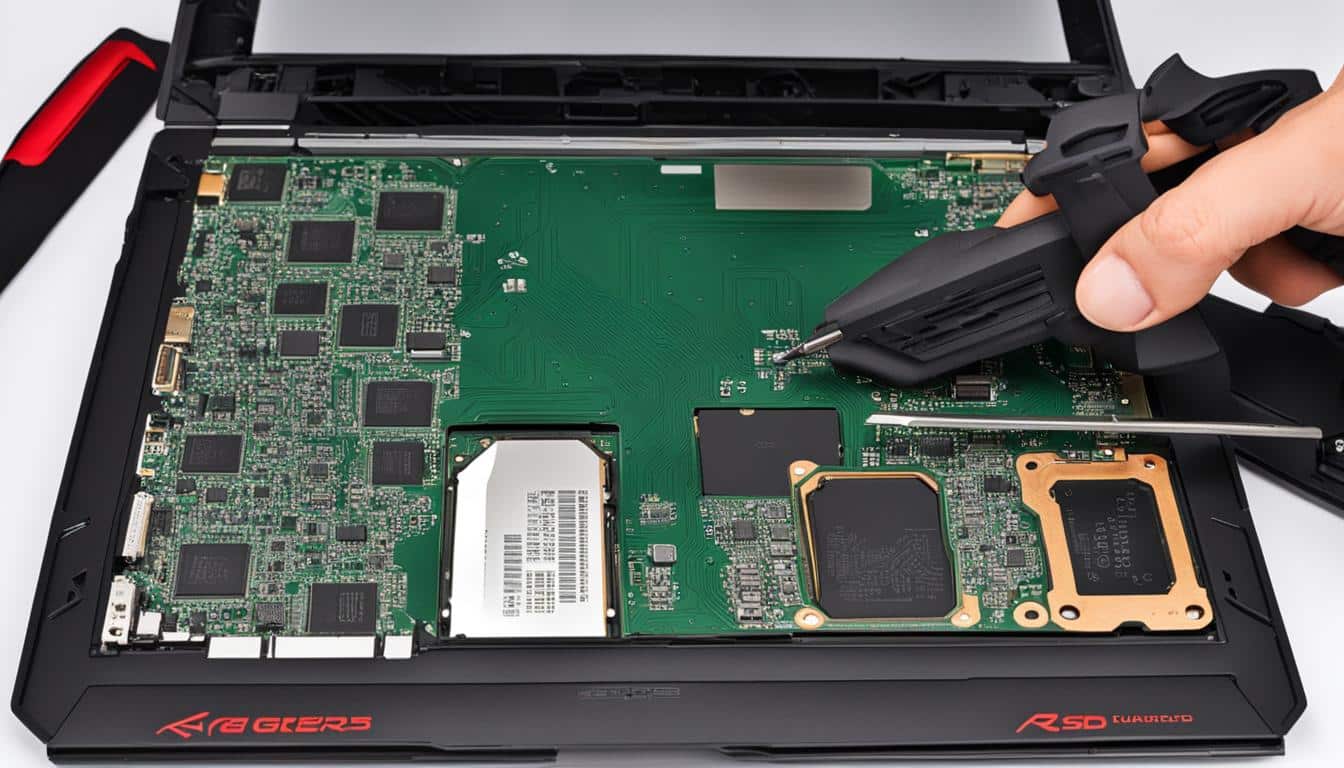
Using the screwdriver and plastic separating tool, carefully open the case of your ROG Ally. Take your time and be gentle to avoid any scratches or damage to the device. Once the case is open, locate the existing SSD.
-
Remove the Old SSD:
With the case open and the old SSD visible, gently disconnect any cables or connectors attached to it. Then, unscrew the SSD from its mounting point and carefully remove it from the device.
-
Install the New SSD:
Take the new M2 2230 SSD and align it with the slot in your ROG Ally. Insert it carefully, ensuring a secure connection. Once the SSD is properly inserted, screw it into place using the same screws that were removed earlier.
-
Close the ROG Ally Case:
After the new SSD is securely installed, close the case of your ROG Ally and fasten any screws or latches to ensure a tight fit. Double-check that all connectors and cables are properly reattached.
-
Power On and Test:
With the SSD upgrade complete, power on your ROG Ally and verify that everything is functioning as expected. Check if the new SSD is recognized by the system and ensure that your data is intact. Run a test to ensure the performance has been improved.
By following this step-by-step guide and troubleshooting any potential issues along the way, you can upgrade your ROG Ally SSD with confidence, knowing that you’ve optimized your gaming rig for the best performance.
Benefits of Upgrading the ROG Ally SSD
Upgrading the SSD on your ROG Ally offers several benefits. Firstly, it provides you with increased storage space, allowing you to install more games and applications without worrying about running out of space. Additionally, upgrading to a larger SSD can optimize the performance of your ROG Ally, reducing load times and improving overall gameplay. With the latest methods to upgrade the ROG Ally SSD, you can ensure your gaming rig is operating at its full potential.
With a larger SSD, you’ll have the freedom to install all your favorite games and applications without the constraints of limited space. Say goodbye to constantly juggling files and uninstalling games to make room for new ones. Enjoy the convenience of having all your gaming content readily available at your fingertips.
But it’s not just about storage. Upgrading your ROG Ally SSD can significantly enhance performance. The latest SSD technology ensures faster data transfer speeds, allowing for quicker access to game files and reducing loading times. Say goodbye to those frustrating delays and hello to seamless gaming experiences.
By upgrading your ROG Ally SSD, you can optimize your gaming rig to deliver smoother gameplay, improved frame rates, and reduced lag. Embrace the power of faster loading times and faster data access, giving you a competitive edge in your gaming adventures.
Don’t compromise on performance. Upgrade your ROG Ally SSD today and unlock the full potential of your gaming rig.

| Benefits of Upgrading the ROG Ally SSD | |
|---|---|
| Increased storage space | Install more games and applications without worrying about storage limitations |
| Optimized performance | Reduced load times and improved overall gameplay |
| Seamless gaming experiences | Faster data transfer speeds for quicker access to game files |
| Competitive advantage | Smoothing gameplay, improved frame rates, and reduced lag |
Choosing the Right SSD for Your ROG Ally
When it comes to upgrading your ROG Ally SSD, selecting the right SSD is crucial for optimum performance and compatibility. Follow these guidelines to choose the perfect SSD for your gaming rig:
Consider Compatibility
ASUS recommends using an M2 2230 SSD for your ROG Ally, as it is the only size that fits perfectly. Ensure the SSD you choose matches this specification to avoid compatibility issues during the installation process.
Storage Capacity
Take into account your storage needs when selecting the SSD. Consider the size of modern games and applications you frequently use. Opt for an SSD with ample storage capacity to accommodate your gaming library without worrying about running out of space.
Research and Compare
Take the time to research and compare different SSD options available in the market. Look for reputable brands that offer reliable performance and positive customer reviews. Comparing prices, read and analyze customer feedback to make an informed decision.

By following these tips, you can choose an SSD that not only matches the specifications of your ROG Ally but also provides the storage capacity and performance you desire. Take your gaming experience to the next level with a seamless SSD upgrade.
Conclusion
Upgrading your ROG Ally SSD is a simple and effective way to enhance your gaming experience. With the step-by-step guide and essential tips provided, you have all the information you need to successfully upgrade your SSD. By following the proper installation procedures and optimizing the performance of your new SSD, you can enjoy faster load times, increased storage space, and improved overall gameplay.
Choosing the right SSD is crucial for a successful upgrade. Ensure compatibility by using an M2 2230 SSD, the recommended size for the ROG Ally. Consider your storage needs and compare different options to find an SSD that offers reliable performance and meets your requirements.
Upgrade your ROG Ally SSD today to unlock the full potential of your gaming rig. With the optimized performance and increased storage space, you’ll be able to install and enjoy your favorite games without any limitations. Follow the provided guide, make the necessary upgrades, and get ready for the ultimate gaming experience.
FAQ
What are the benefits of upgrading the SSD on my ROG Ally?
Upgrading the SSD on your ROG Ally provides increased storage space, faster load times, and improved overall gameplay.
What tools and components do I need to replace the SSD on the Asus ROG Ally?
To replace the SSD on the Asus ROG Ally, you’ll need an M2 2230 SSD, a screwdriver, and a plastic separating tool.
How do I ensure a successful ROG Ally SSD upgrade?
To ensure a successful ROG Ally SSD upgrade, it’s important to choose a compatible SSD size, follow the proper installation procedures, and optimize the performance of your new SSD.
What size and storage capacity should I choose for my ROG Ally SSD upgrade?
ASUS recommends using an M2 2230 SSD for the ROG Ally. Consider the storage capacity based on your needs and the size of modern games and applications.
How can upgrading the SSD optimize the performance of my ROG Ally?
Upgrading the SSD on your ROG Ally can optimize performance by reducing load times and providing ample storage space for games and applications.
